23 January, 2011

Seattle Boat Show

We took a trip up for the Seattle Boat Show. The boat show was a good opportunity to visit with lots of vendors at once, attend free seminars and maybe get some good deals. We were very impressed with Port Townsend Rigging, Hasse & Company Port Townsend Sails, Big Bay Technologies (Navigation Software), Scanmarine (Wallas Diesel Heaters), and Iverson Dodgers. We also took a closer look at some watermakers, and Automatic Identification Systems (AIS). Our dodger and bimini are in fair shape, so we may get an Iverson dodger and bimini combination that can support solar panels. We also met Steve and Judy, owners of "Code Blue" a Caliber 40 in Seattle. Steve and Judy were gracious to invite us to view their boat. We got some great ideas from their boat and enjoyed spending time with them.
The inside of an Isotemp water heater.

ACR 2680 AIS

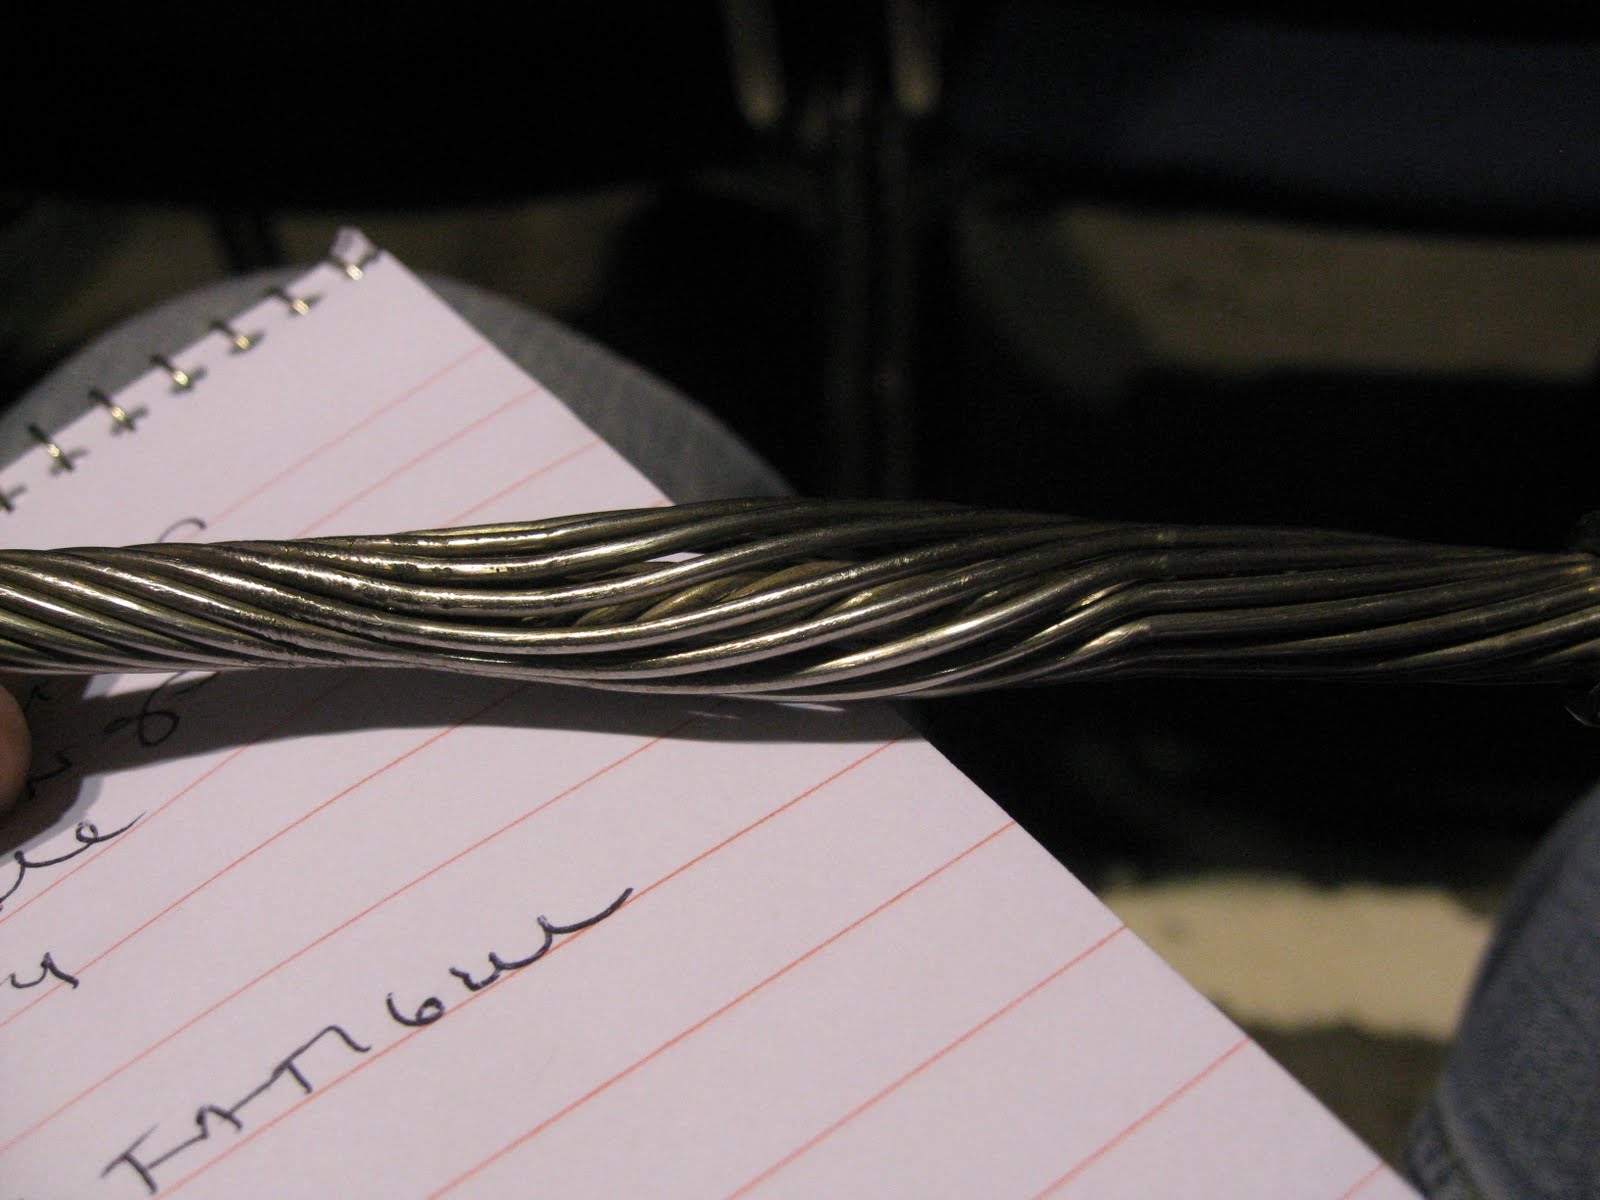
An example of damage from a hallyard wrapped around a stay or shroud. :(
 
Code Blue

Code Blue
 

19 January, 2011

Ram Ball Joint

This was one of the survey findings. The surveyor mentioned the ram ball joint was on the way out, but a marine technician looked at it and said it needed to be replaced. I finally got a look at this joint myself. Now I see what they mean. There is rust around the ball joint and the pin won't come out. I gave it a couple of taps with a hammer and...no movement. Then I gave it a couple more taps with gusto and...nothing. I gave up and sprayed with WD-40. Maybe once the WD-40 soaks in, it'll let me take the sucker out and look for a replacement. More to follow on this. By the way, the arm is a hydraulic linear drive for the autopilot. The unit behind it is the rudder feedback unit.


Stanchion Base Repair Part 2

Some pictures of the attachment of the stanchion base. All that's left is to tighten the stanchion all the way, clean up and detail the area around the base and reattach the cover plates inside the forward head. I was wrong about Life Caulk coming in clear, it only comes in white and wood color - no biggie.


10 January, 2011

Stanchion Base Repair

Our next project was the ram ball joint of the steering system, but we found another leak. This time, not from one of the portholes, but from one of the stanchion bases of the bow pulpit. This leak went under the radar for some time because it leaked into the forwar head shower. We would see drops of water on the shower bulkhead, and dismiss because the shower is a natural place to see drops of water. We haven't used the shower in a couple of weeks now, so when I saw a drop of water on the bulkhead, I took a peak under wooden cover plate, and found the end of a bolt with a drop of water around it and dampness all around. Don Casey book says to jiggle the stanchion, and if water comes out from the nuts and bolts, the stanchion base needs to be rebedded and resealed.
I took all three nuts and bolts off and found one of the holes had been compromised with water. The tough part, was doing the work with a mirror, since the hardware was tucked up behind a cover plate. Luckily, the fiberglass around the area seems to be in good shape and doesn't give when the stanchion base is moved. Unluckily, I noticed that there are two electrical wires going into the stainless steel tube. There are six stanchion bases in the bow pulpit, and this one happens to have the navigation light going through it! This means I'll have to be extra careful not to damage the wires while I'm cleaning the area in and around the holes, and into the stainless steel tube.
For the portlight repair, we used a sealant with adhesive properties, but since this is a deck fitting, we'll have to use an adhesive with sealant properties. Since I have a tube of Life Caulk, I'm going to do a pilot with this product. if I like it, I'll end up using it for the rest of the deck fittings. What we like about this product, is that it comes in a clear variety, so any gaps or mistakes may not show up so obviously.
When I removed the nuts and bolts, I noticed one of thebolts that I removed was bent. I also noticed the base of the stanchion is bent up in one place. I wonder if this is the result of an accident? An impact or pull from behind or a pull from the front could cause the base to bend up in from and separate in the back.
I ran out of daylight to finish this project, so I left the stanchion base in place and taped it up so no water will go in the holes. I also need to go to Ace Hardware or West Marine and buy new nuts and bolts, since the old ones got banged up during removal.


Portlight Repair

After a heavy rain, we noticed some of our portlights leaking. The factory material was 100% grey silicone and I replace with a clear silicone/polyurethane hybrid. What's nice about portlights vs. deadlights, is the portlights can be resealed without removing the window. Deadlights are through bolted so once the deadlight is unscrewed, the whole thing comes out.

In the pictures, you can tell where the old seal was compromised because you can see dirt between the metal and sealant and also rust near fastener holes.

The steps are:

1. Tape around portlight to prevent scraping and also sealant creep.
2. Remove portlight frame with putty knife without bending the frame.
3. Clean off all old silicone from boat and frame. First with chisel, then with dremmel (like a dental tool).
4. Acetone all surfaces for final clean.
5. Tape frame to help cleanup.
6. Apply sealant liberally.
7. Screw in fasteners part-way, until sealant oozes out. Leave for 24 hrs.
8. After sealant cures, screw in all the way for gasket effect.
9. Take tape off.
10. Razor blade off any excess sealant.

First Project: Rubrail Repair

After arriving in Portland , we were reorganizing, and noticed major dampness in one of the cabin lockers and a storage cabinet on the starboard side in the forward cabin. After careful inspection, we noticed the screws protruding inside the locker were also rusty. We turned the heat on inside the cabin to dry things up. After the area inside the lockers dried up a bit, we noticed salt on the wood.

We removed the starboard rubrail last weekend, cleaned the area, applied 5200 in the trough and a big blob in each screw hole. We reattached the rubrail last Saturday.

We had unusually dry weather all week, giving time for the 5200 to cure. Saturday we got hit with a powerful storm and lots of rain. Thankfully, we noticed none of the moisture we were getting before in the locker.

Success!

Delivery - Seattle to Portland


The survey


Here she is! Our 2003 Caliber 40LRC.

This is "Bliss"