27 December, 2011

Global Maritime Distress and Safety System (GMDSS)

Digital Selective Calling (DSC) is part of the Global Maritime Distress and Safety System (GMDSS), an internationally agreed-upon set of safety procedures, types of equipment, and communication protocols used to increase safety and make it easier to rescue distressed ships and aircraft.

DSC can be used to initiate ship-to-ship calls and distress signals. For the distress signal to work, the ship's Maritime Mobile Service Identity (MMSI) number must be programmed into the radio. A Maritime Mobile Service Identity (MMSI) is a series of nine digits which are sent in digital form over a radio frequency channel in order to uniquely identify a ship. Preferably, the radio is also connected to the GPS, so when the "Distress" button is pressed, the preformatted distress message will include information about the ship, as well as the position and time of the distress signal.

Non federal MMSIs are assigned by the Federal Communications Commision (FCC). For ships that do not intend to sail to foreign ports, the FCC has agreed to let BoatUS issue MMSIs. For boats that intend to travel to foreign ports, the MMSI number can be obtained through the FCC as part of the application for ships station license. A ship station license as well as an operator permit are required if you intend to sail to foreign ports and use your radio. A station license or operator permit are not required if you are sailing in international waters, only if you intend to visit foregn ports.

Global Maritime Distress and Safety System (GMDSS)
http://en.wikipedia.org/wiki/Global_Maritime_Distress_Safety_System
Digital Selective Calling (DSC)
http://en.wikipedia.org/wiki/Digital_Selective_Calling
Maritime Mobile Service Identity (MMSI)
http://en.wikipedia.org/wiki/Maritime_Mobile_Service_Identity
MMSI through BoatUS
http://www.boatus.com/MMSI/
MMSI through FCC
http://wireless.fcc.gov/uls/index.htm


06 December, 2011

Kyocera KD135GX

These panels seem to be pretty common in the marine world. Since we took measurements of the bimini, and solar panel manufacturers give you exact measurements of their panels, I could superimpose the panels on the bimini and see how they would fit. These panels fit inside the backstays and block a portion of the windex window.

I even played around with the panels mounted sideways, but that just doesn't look right.

Solar Survey

We're thinking about adding solar panels above the bimini, so we took some measurements to see what sort of panels we can fit up there. The last time I was aloft, I took a picture of the boat from above, so I decided to create a little diagram with the measurements superimposed.A couple of tricky bits with mounting panels above the bimini. For one, we have double backstays that go through the bimini. Also, the bimini has a small window so see the windex on top of the mast.
We'll have to find some panels that fit inside the backstays, and don't interfere with the view of the windex too much.

04 November, 2011

Reefing Line Calculations

This weekend we'll run some small line through the reefing system and check my measurements. Our boom is 12.80 ft, but I put down 13 to round up. The Selden Single Line Reefing installation manual says to make the short reefing lines the length of E (the boom). Then, the long reefing lines should be 4xE for reef 1, and 6xE for reef 2. I've added the loop around the boom (2) as well as from the gooseneck to the deck (2) and from the mast base to the cockpit (14). Then I added 2 extra feet beyond the rope clutch.

31 October, 2011

Port Townsend Rigging Lazy Jack Project

Pictures of our finished lazy jack project.

Selden Single Line Reefing System

The Selden diagram was a little confusing, so I created my own with Visio. The picture is of the Selden single line reefing block. One end is eye spliced, and goes towards the luff reefing grommet. The other end is a block with a line through it. One end of the line goes through the leech reefing grommet, and gets looped around the boom with a bowline and a loop. The other end goes to the mast base or cockpit, where you set the reef. Pulling on the reefing line pulls the luff and leach down at the same time, therefore reducing sail area (reefing).


22 October, 2011

Wax On Wax Off

With colder weather on its way, we decided to get a coat of wax on Bliss before winter.  There are a few steps involved.  First, we wash the boat really well with diluted Simple Green, rinse well and towel dry.  Second, the surface was a bit dull, so we decided to polish the boat before waxing.  We used Collinite 870.  After using the polish, the surface shined like new.  Finally, we added a coat of 3M wax.  We will try the Collinite 885 wax next time.  The topsides and one side of the hull took us both ten hours - what a work out!


Xantrex Battery Monitor

The instructions on the Xantrex installation manual says that these two wires (yellow & brown) should be twisted to reduce noise interference. Originally, they were not twisted. We thought this may be the cause of incorrect readings on our starter battery charge, but that wasn't it. After twisting the cables, the problem is still there.

We had the starter battery tested, and the battery health came back at 50%. So we started looking for a new starter battery. Our fist choice is Mastervolt, but there is a limited sales network here. We may have to settle for our second choice, a Trojan 31M AGM.

17 October, 2011

Mast Boot

During our Tides Marine Strong Track project, we droppped some fasteners inside the mast sail groove. The fasteners fell inside the mast boot, which forced us to cut the boot to retrieve them. The boot was looking a little tired anyway. This is our new mast boot before, during and after.


11 October, 2011

New Sails

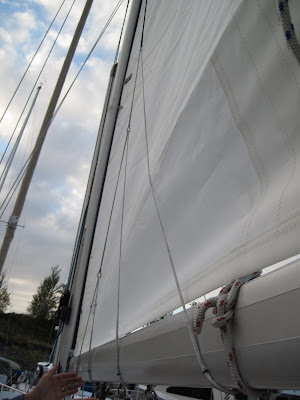
Our new sails are here from Port Townsend Sails and our old sails are in consignment. Our friend Matt helped Geralyn bend on the genoa while I was trying to figure out how to remove the broken tap from the boom. This genoa is smaller than our old genoa. This one is 120%. 100%, being from the headstay to the mast, the sail goes past the mast 20%. Our old genoa was 135%, and didn't have the luff foam, which gave it a funny and not very efficient shape when reefed. The main is drastically different in that it is not integrated with the stackpack and lazy jacks. With this new setup, the mainsail, lazy jacks and possibly stackpack, will be independent of each other. Also, our old mainsail had three reef points. Our new main has only two, but they are deeper reefs, so that the second reef is where the old third reef would have been. We like this better because the old third reef had to be set from the mast. Possibly the last place you want to be when you're setting the third reef. Now we can set reef 1 & 2 from the cockpit. Another big difference is that our new main is loose-footed, so the foot is not attached to the boom. Can't wait to get the lazy jacks installed, so we can go for a test sail. We tried dowsing the sail without lazy jacks and it took Geralyn and I 15 minutes to flake the sail.


Broken Tap

I feel like I dodged a bullet. In my eagerness to mount the lazy jack hardware, I started mounting padeyes into the bottom of the boom. We have a Selden boom, and it has our reefing lines inside the boom along with some blocks that give us 2:1 purchase when reefing. I thought if I cut the fasteners down so that they were just inside the aluminum, I wouldn't run into any of the internal reefing controls. On the second hole of the first padeye, I broke the tap inside the boom. To make matters worse, the broken tap prevented the second reefing line from moving. The tap broke flush to the surface, so there was no way to get it out by reversing. Finally, I had the idea of pulling on the reefing line really hard to dislodge the tap. It worked. When I pulled the line out of the boom, I could see the tap had gone into the line, but not the blocks. I didn't want to leave the tap in the boom, so we coaxed it out with a magnet, since the boom is aluminum and the tap hardened steel.

I think if I continued mounting the padeyes, I may have done permanent damage to the boom. Luckily, I had the idea to contact Port Townsend Rigging. The folks at Port Townsend Rigging suggested a boom slider that goes in the bottom groove of the boom. That way, I don't have to drill any holes and compromise the internal reefing system.

03 October, 2011

02 October, 2011

Lazy Jacks

We're installing a new set of lazy jacks that is independent of the stackpack. We saw the Port Townsend Rigging Lazy Jack system at the Seattle Boat Show, and decided to try it. First step was to mount two cheek blocks on the mast about 25' up. We're just now starting to feel comfortable going aloft, but going aloft with tools and doing precision drilling and tapping is another story. Luckily, with Geralyn on travel, my friend Matt agreed to help. Here are some pictures of drilling, tapping and mounting cheek blocks for our new lazy jack system. The first picture is a template we made to mount the cheek blocks exactly 15 degrees off center.


Fall Chinook Salmon

We have neglected our blog a little, and here's why - it's fall Chinook salmon season on the Columbia River.  We have put in some hours with a line in the water. Geralyn caught this one. It was delicious!

Tides Marine Strong Track

Our old Tides Marine Strong Track was looking quite tired, so we ordered a replacement. The company has all their orders on file, so if you give them your track number, they can pull up your order and provide any assistance or replacement. Tides Marine has really impressed us with quality and customer service. This is our new track.

Naked Bliss

We removed the sails in preparation for removing the sailtrack and bending on new sails. Removing the sail was a little involved because the stackpack and lazy jacks were all integrated. We like the stackpack concept, but we're not sure about it being sown to the sail. We may go back to a stackpack someday now that we have options. Bliss really looks strange without sails.

Portlight Film

Our forward berth portlights are clear, so they don't provide much privacy. There's also no way to shut out the sun in the morning and we didn't want to use curtains. We looked into some very expensive magnetic panels that go over the portlight, but decided to try a cheaper option for now. This film is made by Gila and it provides privacy, UV protection, and shuts direct light out. It also comes off pretty easily with a soapy solution. We're pretty happy with it so far. We like being able to see out of the portlights, so we probably won't do all of them, only selected ones throughout the boat.

02 August, 2011

Engine Maintenance

We have a Yanmar 4JH3E 50HP diesel. The manual calls for oil change every 150 hours. We knew the previous owner had changed the oil right before selling the boat at 460 hours.Our engine just passed 620 hours, so we decided it was time to change the oil. Rather than try to drain the oil out of the drain at the bottom of the engine, we used a manual oil pump inserted into the dipstick hole and sucked all the oil out (6 Qts). This is much easier than trying to fit something under the engine and prevent spillage everywhere. We took advantage and replaced the oil filter, which should be replaced every 300 hours. While the lubrication system was drained, we decided to try and fix another problem that we have been having with our oil pressure gauge. If we've been motoring for a while, the oil pressure gauge will slowly dip into the red. The first time, it happened on the way to Portland from Seattle, which was unnerving. After checking the oil, and playing with the throttle, we decided it was either a oil pressure sender problem or a wiring harness problem. The oil pressure sender reads the oil pressure at the engine crankcase and sends a signal to the gauge in the control panel in the cockpit. We bought a new oil pressure sender and replaced the old one. During our test motor yesterday, the pressure read correctly over an hour of motoring. Success! I'm glad it's not the wiring harness. We also replaced the secondary engine fuel filter. It needs to be replaced every 300 hours, so we will replace it next time the oil filter gets replaced. Since we had the engine compartment open, we also decided to replace the water pump impeller. There was nothing wrong with it, but with it's age unknown, we decided to replace it anyway. After careful inspection, we decided the old one was still in good condition, so we put it back in the spares kit in case of an impeller failure. An interesting note: When we purchased the boat, the spares inventory showed two secondary fuel filters. While doing spares inventory, we noticed one of the fuel filters was the wrong type for any application on board. So while we thought we had two spares on board, we really only had one.

New Oil Pressure Sender


Windlass Maintenance

Our Lighthouse 1501 anchor windlass should be serviced every three years. Last weekend, we intended to service the clutches and the motor, but we spent a whole day just trying to remove the clutches from the shaft. Everything was rusted together. We sprayed PB Blaster and let it sit, then came back with the rubber mallet and coaxed all the pieces apart. While trying to remove a rusted keyway from the shaft, the key got loose and bounced off the deck and into the water. We thought of going after it, but decided to write the manufacturer for the part. A few days later, they sent a new keyway free of charge!

Rusty Emergency Tiller

Our emergency tiller is quite rusty. I found a local outfit to completely strip and clean for $30. I'll have them strip, clean and prep for painting, so I can paint myself.

23 July, 2011

07 July, 2011

Anchor Alarm

Our Furuno chart plotter has an anchor watch feature that you can set in the cockpit and at the nav station independently of each other. What's nice is that it draws a diameter of the limit you set. That way, you don't have to guess what to set it to. Our first night at anchor, we set .010nm (60ft). The anchor alarm went off in the middle of the night and we woke up, flashed the spotlight and tried to determine if we were dragging. The location indicator for the boat was hovering near the edge of our swing radius. After deciding that we were not dragging, and that our swing radius was set too small, we decided to set the anchor watch to .020nm (121 ft). Below are our anchor alarm circles for 2 different nights. The red marks inside the circle are our tracks from swinging at anchor.